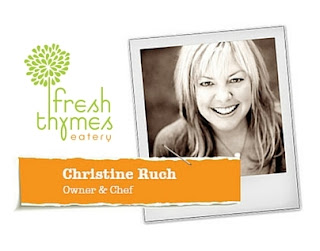
By Christine Ruch, Owner & Head Chef at Fresh Thymes Eatery
Since debuting our bone broth bar a year ago, we’ve learned how to make the most nutrient-dense bone broth, without cutting corners.
Now you enjoy the incredible health benefits of bone broth in the comfort of your home, by following our ten steps for making bone broth.
Enjoy!
- Invest in a big soup or stock pot. If you take the time to make broth, you’ll want to make plenty to last you a week or two.
- Use good, high-quality bones! Organic, pastured-raised and grass-finished are labels that indicate you have good bones. Seek them from your favorite farm store or stand. Also make sure to have a good ratio of gelatinous bones (wings, backs, trotter, necks, knuckles) to boney bones (marrow, femur, should blade).
- Roast the bones first. Roasting the bones helps deepen and enrich the flavor of the broth. No need to be fussy with this step; simply dump the bones on a sheet pan, spread ‘em out, and pop ‘em in a hot oven until they are golden brown.
- Use cold filtered water. Once you roast and place all the bones in your pot, fill the pot with cold, filtered water. Start coaxing minerals from the bone with the burner on low heat. Impurities and throwaway scum will rise to the surface during this step. Cold water is key!
- Add acid. Fancy chefs often use wine in their broth, but what’s really needed is just plain ‘ol acid. Raw apple cider vinegar is best for nourishment. Acid helps pull the minerals from the bones, which is the entire reason you’re making bone broth to begin with. Plus, raw apple cider vinegar is alkalizing to your body. Add a big glug of high-quality raw apple cider vinegar to your pot. (And no, your broth won’t taste like vinegar!)
- Skim. Once the broth has come to a boil, skim the surface scum out, and reduce the heat to a low simmer. If you don’t skim, all the brown and white foam will be in your broth! You don’t want that.
- Let the broth be. Don’t boil your bone broth, and don’t stir it either. Doing both will cause the collagen in the bones to breakdown and impurities will get reabsorbed by the broth, leading to an off-putting taste.
- Leave the stove on. Find a back burner on your stove and park that broth there for up to 3 or 4 days depending on the broth you’re making. Just keep the burner set on its lowest setting, and you should be fine.
- Don’t cover the pot. The flavor intensifies when the top of your pot is left off and the water evaporates. You can add more cold water if the water level gets too low. Good rule of thumb: Keep the bones submerged during the entire process.
- Keep the fat. A little fat cap on the broth will help extend its shelf life by creating a seal over the bone broth. To finish making bone broth, drain the broth to remove tiny bones and fragments, then pour your bone broth into mason jars. Store in the refrigerator. You can reheat the broth on the stovetop before enjoying.
For additional tips for making bone broth at home, check out Stupid Easy Paleo’s blog post: Bone Broth 101 - How to Make the Best Bone Broth.
Show us what you create in the kitchen. Share your bone broth photos on Instagram and tag @FreshThymesEatery!
*
Fresh Thymes Eatery in Boulder, Colorado, is a fast-casual, 100% gluten-free restaurant specializing in allergen-sensitive food that's organic, locally sourced, grass-fed, pasture-raised & made with love. Vegetarian, vegan, paleo or peanut-free—we make righteously delicious food for awesome with tastebuds.
Christine Ruch is the brains and bowls (forks and spoons, too!) behind Fresh Thymes Eatery. With over a quarter century in the food industry, Christine wholeheartedly believes in whole food nutrition and food allergy awareness. Her own experiences living with celiac disease and multiple sclerosis has shown her how real, nourishing food makes all the difference. Christine opened Fresh Thymes Eatery, Colorado’s first Community-Supported Restaurant, in 2013.


No comments:
Post a Comment